One-part vs. two-part polyurethane sealant: cure depth and the wet BC coast
One-part polyurethane cures from the exposed surface inward and its practical depth of cure tops out around 9 to 12 mm, so a deep bead can stay soft in the middle. Two-part polyurethane mixes a base and a hardener that react with each other, so it cures full-depth at a predictable speed in any weather, cold or dry. That one difference in how the two products cure decides almost every choice you make between them. On the wet, cool BC coast the gap gets wider through winter, when a moisture cure slows down and the timeline turns unpredictable.
For a standard-depth window or panel joint with a backer rod, sealed in mild weather, one-part is cheaper, simpler, and works fine; that describes most joints on most buildings. Two-part earns its extra mixing labour on deep or enclosed joints, on cold-season phases, and on high-volume programs where cure speed drives the schedule. A good sealant program uses both, matched to each joint. Here is how to decide, joint by joint, and what to check before you approve the scope.
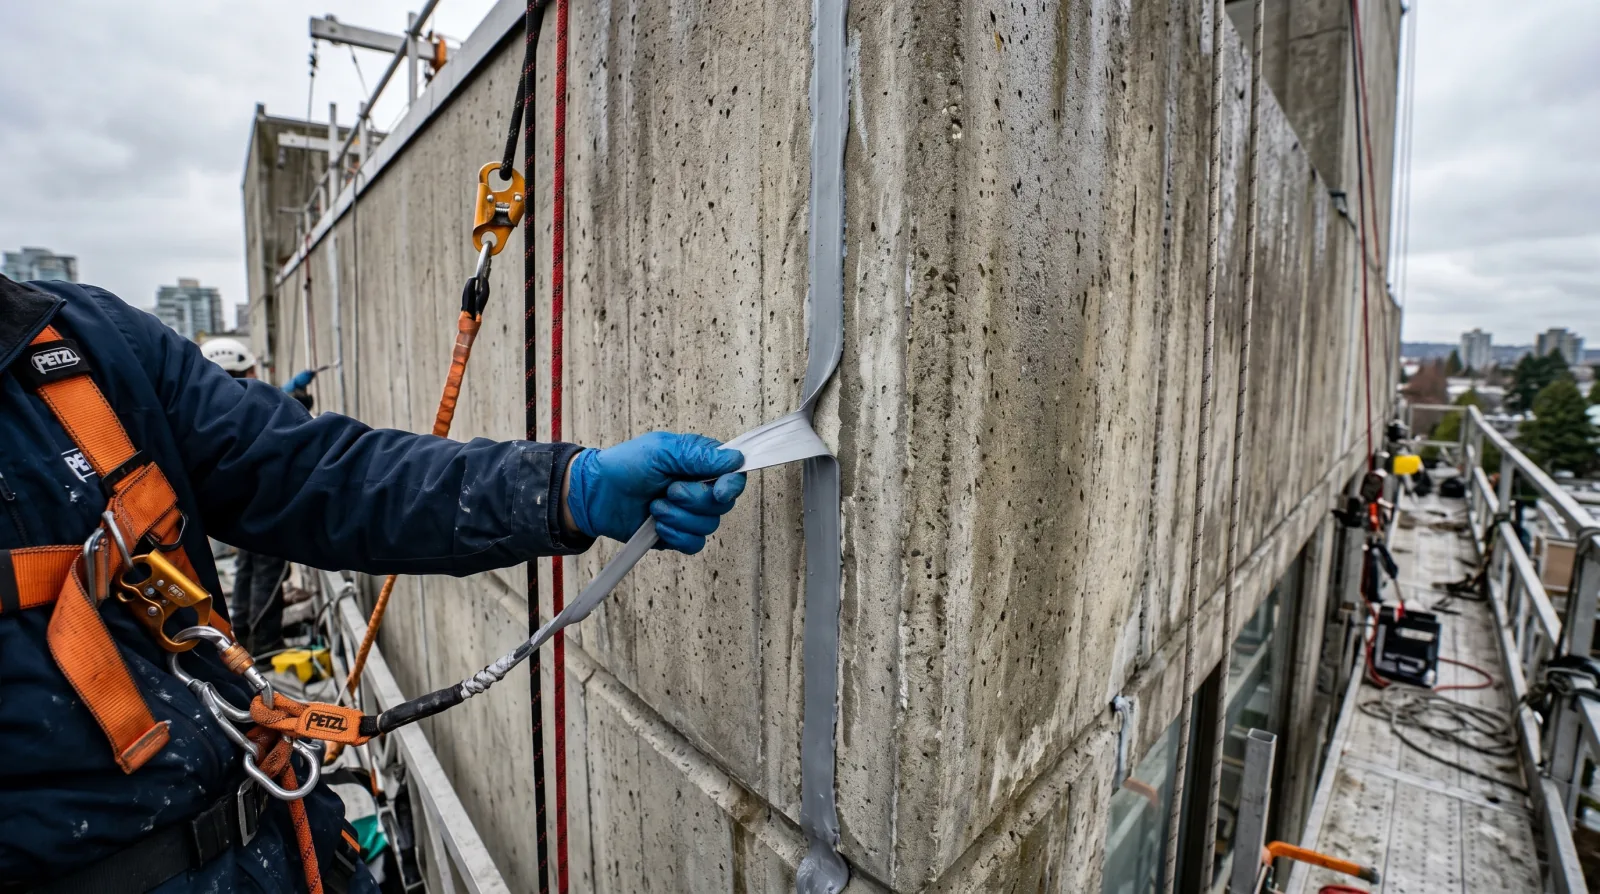
How moisture cure works, and why depth is the limit
Both products are polyurethane and both bond well to concrete, masonry, and most building materials. The difference that matters is how they cure. One-part polyurethane is a moisture-cure product. It reacts with water vapour drawn in from the surrounding air, and that reaction starts at the exposed face of the bead and works its way in. The surface skins over first because that is where the air is. Below the skin, vapour has to diffuse deeper and deeper to keep the reaction going, and diffusion through already-cured rubber is slow.
That is the whole reason a 1K bead has a depth limit. Practical depth of cure lands around 9 to 12 mm in a sensible timeframe. Inside that range the moisture reaches the core within a few days and the bead cures through. Push the bead deeper and the vapour front slows to a crawl, so the centre can stay soft for weeks or months. In a joint that is fully closed off from air, a thick 1K core may never cure at all. It stays rubbery or sticky behind a firm skin, which is the trap: from the outside the joint looks finished.
Cure rate on 1K also moves with the weather. Higher humidity feeds the reaction, so damp air speeds it up; very dry air below roughly 20 percent relative humidity starves it and slows it down. Cold slows the chemistry regardless of humidity. At normal room conditions around 23 C, the surface skins in a few hours, then the cure front advances only a few millimetres per day, and full properties on a normal-depth joint take several days. Those are lab-condition numbers. Real weather on the coast can push them either way.
How two-part chemical cure works, and why depth stops mattering
Two-part polyurethane comes as two components, a base and a curing agent, sometimes called the hardener. They are mixed on site at a set ratio. The cure is the reaction between those two components, not a reaction with the air. Once they are combined and mixed to a uniform colour, the whole batch is curing at the same time, top to bottom, edge to centre. There is no cure front creeping inward and no waiting on humidity to arrive.
Because the reaction does not need air moisture, depth stops being a problem. A deep expansion joint, a wide parkade joint, or a fully enclosed joint cures right through at the same rate as a shallow bead. Cure speed is set by the mix and the temperature, so it is predictable: you can tell the strata when the joint will be ready to paint or to carry load, and be right. Two-part usually reaches handling strength sooner than 1K as well, which is why it fits a tight schedule.
The cost of that certainty is discipline. Two-part must be mixed at the correct ratio, mixed thoroughly with no unmixed streaks, and applied within its pot life, which is the working time before the batch stiffens in the pail. Warmer temperatures shorten pot life, so a batch that was fine in the cool morning can set faster by a warm afternoon. Any batch mixed and not gunned in time is dead product that gets thrown away. A wrong ratio or a lazy mix gives you a bead that never reaches its rated strength, which is a different failure from the 1K soft-core problem but just as real.
What this means through a Vancouver winter
Metro Vancouver damp air is actually good for a one-part moisture cure. On a standard-depth joint in mild weather, spring or early fall, one-part performs well and costs less. The humidity that soaks buildings on the coast is the same humidity that feeds the 1K reaction. So for a lot of the year, on a lot of joints, 1K is the sensible, lower-cost tool.
Cold is the different problem. As the temperature drops through December to February, the moisture-cure reaction slows, and a joint sealed on a cold, wet January day can take much longer to cure through than the data sheet standard-condition number suggests. The timeline becomes hard to predict, which is the real risk on a fixed deadline. On a tight schedule chasing short dry windows between rain cells, a 1K bead that decides to take twice as long as planned can hold up painting, loading, or the next trade.
Two-part cures by the reaction between its two components, not by waiting for humidity or warmth to do the work, so it cures consistently in cold or dry conditions and reaches handling strength sooner. On a cold-season program, or a high-volume job where the schedule cannot absorb days of waiting per bead, that predictability is worth the extra mixing labour. This is the core reason a winter sealant phase on a North Vancouver or West Vancouver tower often leans two-part even for joints that would take 1K in July. If your building is dealing with active water entry that cannot wait for warm weather, our leak repair and water ingress service stages the sealant work around cure conditions instead of the calendar.
The two products compared
One-part (1K) polyurethane
A single-tube sealant that cures by reacting with moisture in the air. It starts curing at the exposed surface and works inward. The default product for most window perimeter and panel joints because it needs no mixing, no batching, and no ratio checks.
Two-part (2K) polyurethane
A base and a curing agent (hardener) mixed on site in a set ratio. The two components react with each other, so the cure does not depend on air moisture reaching the bead. Built for deep joints and weather-independent cure.
The failure modes owners never budget for
The one that costs the most is the soft, uncured core in a deep 1K bead. The surface skins over and reads as sealed, the joint passes a quick visual walk-by, and the sign-off happens. Behind that skin the centre is still rubbery or sticky. A soft core is weak, so under normal joint movement the bead can split from the inside, and an uncured centre can hold and pass water. On a Metro Vancouver building that gives you an open water path through a joint that everyone believes is closed. Rain reaches the assembly behind it, and by the time staining, efflorescence, or interior damage shows up, the repair is far larger than the sealant ever was.
The second failure is the three-sided bond. A sealant is meant to stick to the two joint faces and flex between them like a rubber band anchored at two ends. If the bead also bonds to the back of the joint, it is anchored on three sides and cannot stretch. The first real movement tears it, either from the substrate or through the middle. This is the failure a backer rod prevents, and it hits both 1K and 2K. It is not about chemistry; it is about geometry that got skipped.
The third failure belongs to two-part: pot-life and ratio errors. A batch mixed at the wrong ratio, or mixed poorly with unblended streaks, cures to a bead that never reaches its rated properties. It may feel firm and still be weak. A batch that sits past its pot life gets partly gunned and partly wasted, and the part that went in late may not bond well. None of these show on a surface glance, which is why two-part work needs a crew that batches and mixes with discipline, not just a crew that owns the product.
Backer rod and joint geometry: what keeps one-part honest
The reason 1K works on most joints despite its depth limit is the backer rod. A closed-cell foam rod is pushed into the joint before the sealant goes in. It does two jobs at once. It sets the depth of the sealant bead, so a moisture-cure product stays thin enough to cure through from the surface. And it forces the two-sided bond: the sealant sticks to the two joint faces but releases from the rod behind it, so the bead can flex without tearing. Closed-cell foam is used because it does not soak up water and does not off-gas into the fresh bead.
The depth is not a guess. ASTM C1193, the joint design guide, sets the geometry. The minimum joint is 1/4 inch by 1/4 inch. For joints roughly 1/2 inch to 1 inch wide, the sealant depth should be about half the width, a 2:1 width-to-depth ratio. For joints wider than 1 inch, the depth is held at about 1/2 inch. C1193 also calls for a safety factor of roughly 1.25 to 1.5 on the calculated movement, so the joint is sized with headroom rather than to the edge of its capacity. The backer rod is what lets a crew hit those numbers reliably on every joint.
Put the two facts together and the 1K depth limit almost never bites on a properly designed joint, because a correct backer rod keeps the bead inside the 9 to 12 mm range that moisture cure can reach. It is only the genuinely deep joint, where a shallow bead is not appropriate, or the enclosed joint with no path for air, that pushes the decision to two-part. When a proposal has no backer rod line item, that is the moment to stop and ask questions, because both the cure-depth problem and the three-sided-bond problem trace back to a missing or wrong rod.
Surface prep and correct specification
Neither product bonds to a dirty or failing surface. The old sealant has to come out fully, not get caulked over, because new sealant bonded to a failed bead just fails again at the same spot. The joint faces need to be cleaned to sound, dry substrate, and some substrates need a primer for the sealant to grip. This is true for 1K and 2K alike; the chemistry choice does nothing if the bond to the wall is bad. A field peel or pull result of "the sealant came off clean with no substrate attached" is an adhesion failure, and it usually means prep or primer was skipped.
Correct specification starts with the joint, not the product. Measure the width, probe the depth, note whether the faces are open to air or enclosed, and note the weather the joint will cure in. Only then do you choose 1K or 2K and set the backer rod depth to the C1193 ratio. A specification that names one product for the whole building has skipped this step. On a mixed building you will often see 1K on the standard window and panel joints and 2K on a handful of deep expansion joints, which is not indecision; it is matching the tool to the joint. This is the same joint-by-joint discipline we bring to a full recaulk versus spot repair decision, where the scope also turns on the real condition of each joint rather than a blanket rule.
Standards and what to verify
Four standards cover this work, and a strata manager does not need to memorize them, only to see them named in the specification. ASTM C920 is the standard specification for elastomeric joint sealants. It sets the movement classes: 12.5, 25, 35, 50, and 100, where the number is the percent of joint width the sealant can take in movement. Commercial polyurethane, whether 1K or 2K, is typically Class 25, meaning about plus or minus 25 percent of the joint width. Note what this means for the 1K vs 2K choice: it is not about movement class. Both are usually Class 25. You choose between them for cure depth and cure certainty, not for how far they stretch.
ASTM C1193 is the joint design guide covered above: minimum size, the 2:1 depth-to-width ratio in the mid range, the 1/2 inch depth cap on wide joints, and the movement safety factor. ASTM C1521 is the field hand-pull adhesion test, done on the installed joints once they have cured, and it is the check that tells you the bond is real on this building, not just in a lab. ASTM C794 is the lab peel adhesion test, used to qualify a sealant and substrate pairing before the work. A proposal worth approving names the C920 class, follows C1193 for geometry, and calls for C1521 field checks after a proper cure time, so the finished joints are verified rather than assumed. For how field adhesion testing fits into a wider condition survey, our building envelope repair service pairs the sealant checks with the rest of the wall assessment.
Cost drivers, without inventing prices
The honest way to talk cost here is by driver, not by a dollar figure that changes with the market. One-part carries lower material cost and, more to the point, lower labour cost, because there is no mixing, no batching, and no pot-life race. A small crew can gun a lot of standard joints without special skill. There is little wasted product because you use only what you gun.
Two-part costs more on several fronts. Mixing takes labour and equipment. It takes more skill, so the crew rate is higher and the risk of a bad batch is real. Pot life forces batch sizing and pace management, and any batch not used in time is thrown out, which is direct material waste. On the other side of the ledger, two-part can save schedule cost, because its faster, predictable cure lets a program move face by face without waiting days per bead, and on a cold-season job it avoids the schedule blow-up of a 1K cure that stalls. Access is its own driver on both products. Rope access work to WorkSafeBC Part 11 rules, common on Vancouver towers, adds cost and makes cure-wait time and on-line mixing part of the plan, not an afterthought.
Lifecycle and total cost, not just the quote
The cheapest quote is not the cheapest joint over its life. A 1K bead that stalls soft in a deep joint reads as a saving on the invoice and a loss the first winter it lets water through. The failed joint has to be cut out and redone, and whatever the water damaged behind it has to be repaired too. That is why the cure-depth question belongs in the scope from the start, not in a warranty argument two years later.
Run the numbers over the expected service life of the joint, not the day of the pour. On deep and cold-weather joints, the extra up-front cost of two-part usually buys a joint that cures right the first time and stays sealed, against a 1K bead that may need a callback. On standard joints in mild weather, the reverse is true: paying for two-part where 1K would cure fine is money spent on mixing labour and wasted batches for no lifecycle gain. Total cost thinking is what pushes you toward the right product per joint rather than a single cheap or single premium choice across the building.
Warranty reality
A material warranty on the sealant is not a warranty that the joint will hold. Manufacturers warrant the product when it is installed per their instructions and the relevant standards, which means correct joint design, correct backer rod, clean and primed substrate, correct 1K depth or a correct 2K mix, and proper cure. If a deep 1K joint fails because the core never cured, or a 2K joint fails because the ratio was wrong, that is an installation problem, not a product defect, and the material warranty does not cover it.
This is why the verification steps matter more than the warranty paper. A field adhesion test to C1521 on the finished joints, a backer rod that was actually installed at the right depth, and a recorded cure time before painting or loading are what give you a joint that will hold and a paper trail if it does not. Ask for those in the scope. A contractor who plans them is telling you they expect the joints to pass a real test, which is the point.
What each product cannot do
One-part cannot cure through a deep or enclosed bead in a sensible timeframe, and no amount of good workmanship changes that; it is the chemistry. Using 1K where the geometry calls for 2K is the wrong tool, full stop. One-part also cannot be relied on to hit a tight schedule in cold weather, because the cure slows and the timeline drifts.
Two-part cannot be run casually. It cannot forgive a wrong ratio, a poor mix, or a blown pot life, and it wastes material on small scattered joints where a full batch is overkill. Using 2K everywhere on a building of standard joints is not being careful; it is paying for mixing labour and thrown-out batches that the job never needed. Neither product can cover for bad prep. Sealant over a dirty face, a failed old bead, or a missing primer will fail regardless of which chemistry you chose. The product choice sits on top of good joint design and clean substrate; it does not replace them. For the wider view of how polyurethane compares with the other chemistries you will see specified, our polyurethane versus silicone guide and our polyurethane versus hybrid MS guide cover the trade-offs that come before the 1K versus 2K decision.
How to read a contractor's proposal
Start with product selection. A proposal that names 1K or 2K per joint type, and gives a reason, has done the survey work. A proposal that names one product for every joint on the building has not, and that is the single biggest tell. Look next for a backer rod line item, because its absence usually means the depth-to-width ratio and the 1K cure depth were both ignored. Look for a cure-time allowance before any painting, coating, or loading, and check that the winter schedule uses realistic cold-weather cure times rather than the standard-condition figure.
Then look for verification: a field adhesion test to ASTM C1521 on the finished joints, and on 2K work, some note of how mix ratio and pot life are controlled. Confirm the old sealant is removed and the faces cleaned, not caulked over. A proposal that covers product-per-joint, backer rod, cure time, and adhesion testing is one where the finished joints are being checked rather than taken on trust. One that skips them is where hidden failures start. If glazing joints are part of your scope, the same read-the-proposal discipline applies to the wet glazing versus dry glazing decision, where the sealant detail again decides whether the assembly stays watertight. The full set of these decisions lives on our sealant and caulking resource hub.
Scenarios from Metro Vancouver buildings
The rules above are easier to see on real jobs. Here are four that come up across the buildings we work on, and the call each one points to.
Kitsilano mid-rise, spring window perimeter recaulk
A four-storey residential building in Kitsilano needs its window perimeter joints recaulked. The joints are standard width, the depth is normal, and the work is scheduled for a mild, dry stretch in spring. The strata is watching the budget on a routine maintenance line.
Call: One-part polyurethane.
These are ordinary joints with faces open to air, sealed in mild weather. With backer rod set at the right depth, a 1K bead cures through with no trouble, and the mild spring humidity in Vancouver helps rather than hurts the moisture cure. Two-part here would add mixing labour and pot-life waste for no gain. The simpler, cheaper product is genuinely the right call.
Richmond concrete building, wide deep parkade expansion joints
A Richmond building has wide expansion joints running through the parkade deck and up the precast concrete panel walls. The joints are deep, and the parkade joints will carry vehicle traffic soon after the work. Water ingress into the parkade has already been reported.
Call: Two-part polyurethane.
These joints are too deep for a 1K bead to cure through, and a soft core in a joint that already leaks is exactly the hidden water path to avoid. Two-part cures full-depth and reaches load-bearing strength on a predictable schedule, so the deck can take traffic sooner. The extra mixing labour is worth it because the alternative is a joint that reads sealed but passes water.
North Vancouver tower, January cold-season sealant phase
A high-rise in North Vancouver has a sealant phase that cannot wait for spring. It is January, cold and wet, and crews are working off rope access chasing short dry windows between rain cells. The schedule is fixed and there is no room to lose days waiting on cure.
Call: Lean two-part polyurethane.
In cold January air a 1K moisture cure slows down and the timeline becomes hard to predict, which is the worst thing on a fixed deadline. Two-part cures by chemical reaction regardless of the cold, reaches handling strength sooner, and does not stall if the temperature drops mid-cure. On rope access with limited time per drop, that predictability keeps the phase on track.
Burnaby low-rise, scattered spot repairs on panel joints
A Burnaby low-rise needs a handful of failed panel joints replaced, scattered across a few faces. The joints are standard depth, the weather is mild, and the total volume of sealant is small.
Call: One-part polyurethane.
For a small, scattered scope of standard joints, mixing two-part would waste material on every small batch and add labour that the job does not need. One-part guns straight from the tube, the crew can move face to face without racing a pot life, and the mild Burnaby weather supports the moisture cure. This is a clear case where the cheaper product wins on merit.
Decision framework: questions that point to the right product
| Question | Recommendation | Reason |
|---|---|---|
| Standard-depth joint, faces open to air, mild weather? | One-part | A normal window or panel joint with a backer rod at the right depth cures fine on 1K moisture cure, at lower cost and with no mixing. This is most joints on most buildings. |
| Deep or fully enclosed joint? | Two-part | One-part cures from the surface in and can leave a deep bead soft in the centre. Two-part cures full-depth because it does not need air to reach the core. |
| Cold-season sealant phase on the BC coast? | Lean two-part | One-part slows sharply in cold, damp winter air and a joint may take much longer than the data sheet says. Two-part cures on schedule regardless of weather. |
| Short dry window between rain cells, tight schedule? | Two-part for speed | When crews are chasing dry hours, two-part reaches handling strength faster and does not stall if the humidity or temperature shifts mid-cure. |
| Small crew, simple scope, no deep joints? | One-part | No mixing, no pot-life pressure, no wasted batches. For straightforward joints in mild weather, one-part is the practical, lower-cost choice. |
| High-volume program with a fixed deadline? | Two-part | Predictable full-depth cure and faster turnaround let a large program move face by face without waiting days for each bead to cure through. |
| Wide parkade expansion joint carrying traffic soon? | Two-part | These joints are deep and need to reach load-bearing strength on a schedule. Two-part cures through and gets there faster; a 1K bead would stay soft in the middle. |
| Very dry indoor or heated space, air below 20 percent RH? | Consider two-part | One-part needs air moisture to cure. In very dry air the moisture cure crawls. Two-part does not depend on humidity, so it stays on schedule. |
| Rope access work with limited time on the drop? | Depends on joint depth | For standard joints, 1K keeps the drop simple with no mixing on the line. For deep joints reached by rope, 2K is still correct; plan batching and hoisting around the access. |
| Not sure how deep the joint really is? | Survey first | Do not guess. Probe the joint depth and set backer rod before choosing. Product selection follows the geometry, not the other way around. |
Questions to ask before you approve the scope
Take this list into the conversation with your contractor. Each question has an answer that should make you stop and ask for more.
- Which product is specified for each joint type, and why? Red flag: Same product for every joint regardless of depth. That means nobody looked at the geometry.
- Is backer rod a separate line item, installed at the correct depth? Red flag: No backer rod line item. Without it, a 1K bead can be too deep to cure through and bonds to three sides.
- What cure time is allowed before painting, coating, or loading the joint? Red flag: No cure-time allowance in the schedule. Painting or loading a soft bead ruins it.
- For any deep joint, is two-part specified, or how is a 1K bead kept thin enough to cure? Red flag: One-part in a deep joint with no plan for the bead depth. The centre may never cure.
- How will cold-weather cure be handled if work runs through winter? Red flag: The proposal ignores weather and quotes standard-condition cure times for a January pour.
- On two-part work, how are mix ratio and pot life controlled? Red flag: No mention of batch sizing or mixing discipline. Bad ratios and blown pot life waste product and give weak beads.
- Is old sealant fully removed and are the joint faces cleaned before new sealant goes in? Red flag: Caulking over the old bead. New sealant bonds to failed sealant, not to the substrate, and fails again.
- Will finished joints be checked with a field adhesion test to ASTM C1521? Red flag: No field adhesion testing. The bond is being taken on faith.
None of these questions need a building science degree to ask. They are the difference between a joint that was designed and verified and a joint that was guessed. On a strata building where a depreciation report under the Strata Property Act is tracking the envelope, getting the sealant scope right is part of protecting that asset, and it starts with the questions above.
Quick answers
What is the difference between one-part and two-part polyurethane sealant?
One-part polyurethane comes ready to use in a single tube and cures by reacting with moisture in the air. It starts curing at the exposed surface and works inward, so a deep bead cures slowly and can stay soft in the middle. Two-part polyurethane comes as a base and a curing agent that are mixed on site in a set ratio. The two parts react with each other, so the cure does not depend on air reaching the bead, and it cures right through the full depth at a predictable speed. One-part is simpler and cheaper to apply. Two-part cures faster, deeper, and more consistently in poor weather but needs correct mixing and pot-life management.
How deep can one-part polyurethane sealant cure?
One-part moisture-cure polyurethane cures from the exposed surface inward, and its practical depth of cure is limited to roughly 9 to 12 mm in a reasonable timeframe. Beyond that, atmospheric moisture cannot reach the core fast enough, so a very deep bead can stay soft in the centre for a long time, sometimes indefinitely if the joint is enclosed. This is why a backer rod is installed at the correct depth on any professional joint: it controls the bead depth so the sealant is thin enough to cure through and gives the right depth-to-width ratio for movement. For a genuinely deep or enclosed joint where a shallow bead is not appropriate, two-part polyurethane is the correct choice because it cures full-depth regardless of air access.
How long does one-part polyurethane take to cure in Vancouver?
The weather decides it. One-part polyurethane skins over on the surface within a few hours, then the cure front advances inward slowly, on the order of a few millimetres per day at normal room conditions of about 23 C and moderate humidity. On a standard-depth joint that means several days to reach full properties. Metro Vancouver damp air actually helps the moisture cure, but cold slows it down, so a joint sealed in a cold, wet January can take noticeably longer than the data sheet standard-condition figure. Plan the schedule around real coastal winter conditions, not the ideal-lab number, and do not load or paint the joint before it has cured.
Polyurethane cure questions
What is the difference between one-part and two-part polyurethane sealant?
One-part polyurethane comes ready to use in a single tube and cures by reacting with moisture in the air. It starts curing at the exposed surface and works inward, so a deep bead cures slowly and can stay soft in the middle. Two-part polyurethane comes as a base and a curing agent that are mixed on site in a set ratio. The two parts react with each other, so the cure does not depend on air reaching the bead, and it cures right through the full depth at a predictable speed. One-part is simpler and cheaper to apply. Two-part cures faster, deeper, and more consistently in poor weather but needs correct mixing and pot-life management.
How deep can one-part polyurethane sealant cure?
One-part moisture-cure polyurethane cures from the exposed surface inward, and its practical depth of cure is limited to roughly 9 to 12 mm in a reasonable timeframe. Beyond that, atmospheric moisture cannot reach the core fast enough, so a very deep bead can stay soft in the centre for a long time, sometimes indefinitely if the joint is enclosed. This is why a backer rod is installed at the correct depth on any professional joint: it controls the bead depth so the sealant is thin enough to cure through and gives the right depth-to-width ratio for movement. For a genuinely deep or enclosed joint where a shallow bead is not appropriate, two-part polyurethane is the correct choice because it cures full-depth regardless of air access.
How long does one-part polyurethane take to cure in Vancouver?
The weather decides it. One-part polyurethane skins over on the surface within a few hours, then the cure front advances inward slowly, on the order of a few millimetres per day at normal room conditions of about 23 C and moderate humidity. On a standard-depth joint that means several days to reach full properties. Metro Vancouver damp air actually helps the moisture cure, but cold slows it down, so a joint sealed in a cold, wet January can take noticeably longer than the data sheet standard-condition figure. Plan the schedule around real coastal winter conditions, not the ideal-lab number, and do not load or paint the joint before it has cured.
When should a strata specify two-part polyurethane instead of one-part?
Two-part is worth specifying in three situations. First, deep or enclosed joints, such as wide expansion joints, where a one-part bead would stall in the middle: two-part cures full-depth. Second, cold-season work on the BC coast, because two-part cures by chemical reaction and does not slow down when the winter air is cold and the moisture cure would drag. Third, high-volume programs on a fixed deadline, where the faster and more predictable cure lets crews move face by face without waiting days for each bead. For a standard-depth window or panel joint in mild weather with a small crew, one-part is simpler and cheaper and performs just as well.
Does two-part polyurethane cure better in cold, wet weather?
Yes, more predictably. One-part polyurethane relies on moisture in the air to drive its cure, so cold slows it and the timeline becomes hard to predict through a wet BC winter. Two-part polyurethane cures because the base and the curing agent react with each other, a reaction that proceeds regardless of how much moisture is in the air. That makes two-part the more weather-independent option for cold-season sealant work in Metro Vancouver. The trade-off is that two-part must be mixed at the correct ratio and used within its pot life, which demands more skill and produces waste if a batch is mixed and not applied in time.
Why does a backer rod matter for polyurethane cure?
A backer rod is a closed-cell foam cylinder pushed into the joint before the sealant goes in. It does two jobs. It sets the depth of the sealant bead so the sealant only bonds to the two joint faces, not to the back of the joint, which gives the two-sided bond a sealant needs to flex without tearing. And by keeping the bead at a controlled, moderate depth, it keeps a one-part moisture-cure sealant thin enough to cure through from the surface. Without a backer rod, a one-part bead can be too deep to cure in the centre, and it bonds to three sides and tears when the joint moves. On any professional joint, backer rod at the correct depth is not optional.
Can one-part and two-part polyurethane be used on the same building?
Yes, and often they should be. A well-scoped sealant program picks the product per joint type, not one product for the whole building. Standard-depth window perimeters and panel joints with a proper backer rod can run on one-part at lower cost, while a small number of deep expansion joints or a cold-weather phase can be specified in two-part for reliable full-depth cure. What matters is that each joint gets a product suited to its depth, exposure, and the weather it will cure in, and that both are installed over clean, sound joint faces with the old sealant fully removed. Matching the product to the joint is the same discipline that governs choosing between chemistries in the first place.
What is pot life and why does it matter for two-part sealant?
Pot life is the working time you have after mixing a two-part sealant before it starts to stiffen in the pail and can no longer be gunned cleanly. Once the base and hardener are combined, the reaction is running whether or not the crew is applying it. If a batch is mixed too large or the crew slows down, part of that batch hardens before it reaches the joint and gets thrown out. This is why two-part work needs planning: batch sizes matched to crew pace, mixing only what can be placed in time, and clean equipment ready. Warmer temperatures shorten pot life, so the same batch size that worked in the morning may set faster by afternoon.
What happens if a deep one-part bead does not cure in the middle?
You get a joint that looks finished but is not. The surface skins over and reads as sealed, while the core stays soft and rubbery or even sticky for weeks, months, or in a closed joint indefinitely. A soft core is weak, so under joint movement the bead can split internally, and an uncured centre can hold and pass water. On a Metro Vancouver building that hidden water path lets rain reach the assembly behind the joint, and by the time staining or interior damage shows up the repair is far larger than the sealant. This is exactly the failure that a correct backer rod depth or a switch to two-part prevents, and it is why cure depth belongs in the scope from the start.
What ASTM standards apply to polyurethane joint sealant?
ASTM C920 is the standard specification for elastomeric joint sealants and sets the movement classes: 12.5, 25, 35, 50, and 100, where the number is the percent of joint width the sealant can take in movement. Commercial polyurethane, whether one-part or two-part, is typically Class 25. ASTM C1193 is the joint design guide that sets minimum joint size and the depth-to-width ratio, including backer rod use. ASTM C1521 is the field hand-pull adhesion test done on installed joints, and ASTM C794 is the lab peel adhesion test. A proper specification names the C920 class, follows C1193 for geometry, and calls for C1521 field checks so the finished joints are verified, not assumed.
How should joint depth relate to joint width for polyurethane?
ASTM C1193 gives the rule. The minimum joint is 1/4 inch by 1/4 inch. For joints roughly 1/2 inch to 1 inch wide, the sealant depth should be about half the width, a 2:1 width-to-depth ratio. For joints wider than 1 inch, the depth is held at about 1/2 inch. A backer rod sets this depth. The reason the ratio matters is that a bead that is too deep is stiff and prone to internal tearing, and on one-part it may be too thick to cure through. A correctly shaped bead flexes over its full life and, on one-part, stays inside the depth that moisture cure can reach.
How can I verify a finished polyurethane joint was installed correctly?
Ask for a field adhesion test to ASTM C1521, a hand-pull check done on the installed joints once cured, and confirm the contractor allowed proper cure time before that test. On two-part work, confirm the crew tracked mix ratio and pot life. On one-part, confirm backer rod was installed at the correct depth so the bead could cure through. A good proposal will also show product selected per joint type rather than one product used everywhere, a backer rod line item, and a cure-time allowance before any painting or loading. If the proposal has none of these, the finished joints are being taken on faith, which is where hidden failures start.
Deep joints or a winter sealant program to plan?
We survey joint depth, exposure, and the weather window across Vancouver, North Vancouver, West Vancouver, Burnaby, Richmond, and Coquitlam, then specify one-part or two-part polyurethane per joint so nothing cures soft in the middle or stalls waiting on the weather.