Field Sealant Adhesion Testing on BC Restoration Projects
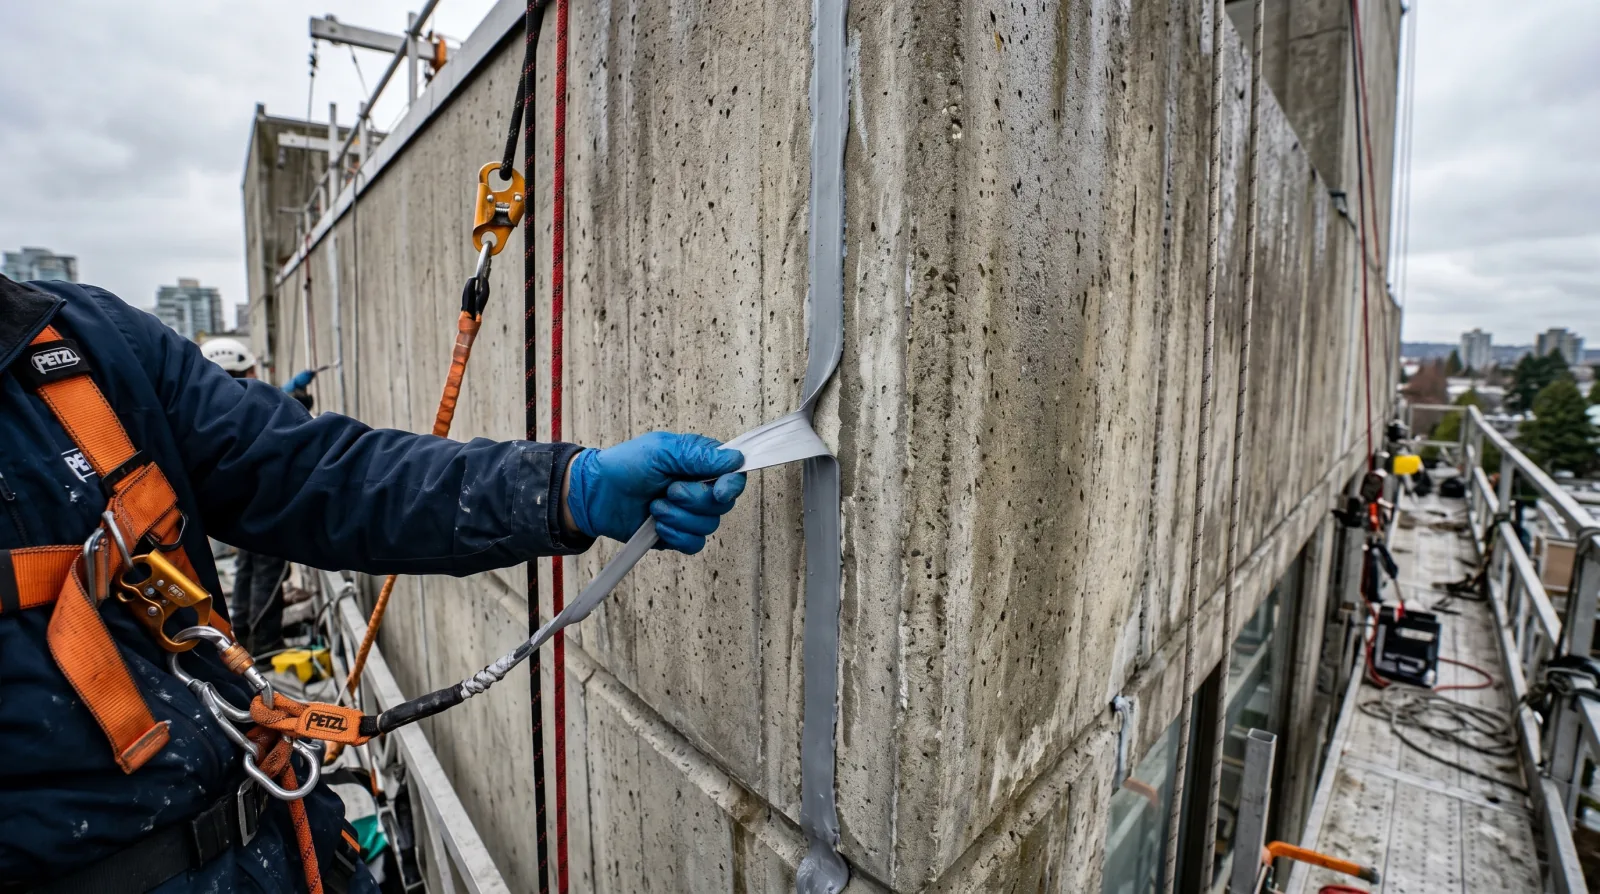
A sealant joint can look flawless and still be a complete failure. The bead is straight, the colour matches, the tooling is clean — and the material never bonded to the substrate underneath it. Everything looks sealed. Nothing is sealed. The first wind-driven rain of the season finds the gap, and a facade that just passed visual inspection starts leaking.
The only way to know a sealant has actually bonded is to test it. And the test is simple enough that there’s no excuse for skipping it.
The test that takes a minute
The standard method is the hand pull test, described in ASTM C1521, the standard practice for evaluating adhesion of installed weatherproofing sealant joints. The mechanics are basic: once the sealant has cured, a technician cuts a tab of it free at the test location, grips the tab, and peels it back at a sharp angle while watching how it fails. The way it fails is the whole answer.
There are two outcomes that matter.
Cohesive failure — the sealant tears apart within itself, leaving sealant still bonded to both faces of the joint. This is what you want. It proves the bond to the substrate is stronger than the sealant’s own internal strength. In service, that joint will stretch and compress with the building’s movement and hold its grip on both sides.
Adhesive failure — the sealant peels cleanly off the substrate, leaving a bare, clean surface with no sealant clinging to it. This is a failure. The bond is the weakest link, which means that joint will let go under movement and weather, and water will track in right at that interface.
The counterintuitive part trips people up every time. You want the sealant to tear itself apart. A clean peel — the result that looks tidy — is the disaster. A messy tear that leaves sealant stuck to both surfaces is the pass.
Why sealant fails to bond in the first place
A sealant not sticking is almost always a preparation or compatibility problem, not a defect in the material. The usual culprits:
- Contaminated surfaces — dust, old sealant residue, form-release agents on concrete, loose coatings, or oils on the substrate
- Missing or wrong primer — many sealant-substrate combinations need a specific primer, and skipping it or using the wrong one kills the bond
- Incompatible substrate — anodized aluminum, certain coated metals, some natural stones, and previously sealed joints are all known to be difficult
- Moisture in the joint at the time of application — a real risk in our climate, where a “dry” window between Pacific storms can still leave damp substrates
- Wrong sealant for the material — a sealant rated for one substrate may simply not adhere to another
None of these show up in a visual inspection. They show up in a pull test, and only in a pull test.
The mock-up: catch it before it’s everywhere
The smartest place to run the first pull test is before any production work starts at all. That’s the mock-up — a small trial application of the exact specified system: same sealant, same primer, same surface preparation, applied to the actual substrates on the actual building. After it cures, it gets pull tested.
The mock-up answers the only question that matters before a crew seals thousands of metres of joint: does this sealant, with this primer and this prep, actually bond to this building? If the answer is no, you’ve learned it on a test patch the size of your hand instead of across the entire facade.
A failed mock-up isn’t a setback — it’s the system doing its job. The response is to diagnose the cause, change the primer or the prep or the sealant, apply a fresh mock-up, and test again. Nothing scales up until a mock-up passes. This discipline is the difference between a sealant program that holds and one that becomes a warranty claim. It’s also why the choice between polyurethane and silicone for expansion joints can’t be made on price alone — the material has to bond to the specific substrates in front of you, and the mock-up proves whether it does.
Testing through the job, not just at the start
A passing mock-up doesn’t mean every joint on the building is fine. Substrates vary across a large facade, sealant comes in different batches, workmanship drifts, and weather changes from one elevation to the next. So beyond the mock-up, periodic field pull tests run as the work progresses — a set frequency per area or per elevation, plus extra tests whenever the substrate changes, a new sealant batch opens, or conditions shift.
The frequency belongs in the project specification, not left to chance. Testing throughout the job catches the joint on the north elevation that didn’t get primed the same way, or the section sealed on a damp morning that the rest weren’t. Each destructive test removes a short length of sealant, which is immediately re-primed and re-sealed to the same standard, leaving a fully weathertight repair. The cost of a handful of repaired test spots is nothing next to the cost of discovering an adhesion failure after the building has been leaking through a winter.
Testing old sealant tells you whether to remove it
Pull testing isn’t only for new work. During a condition assessment on an aging building, testing the existing sealant tells you whether it’s still bonded or has quietly let go of the substrate. That distinction drives the repair decision. Sealant that’s merely weathered on the surface but still firmly bonded may be a candidate for restoration; sealant that has lost adhesion needs full removal and replacement.
This is exactly the judgment behind when to remove sealant versus apply a cap bead. A cap bead over sealant that’s already failed adhesion is doomed — you’re bonding new material to a surface that’s letting go underneath. The pull test removes the guesswork. It’s the same diagnostic logic as recognizing the broader signs a building needs sealant replacement, applied at the level of a single joint.
Who has to ask for it
Here’s the gap that lets this fall through the cracks: adhesion testing only happens if someone writes it into the specification. On a properly specified BC restoration project, the building envelope consultant or engineer includes mock-ups and periodic field pull tests as standard quality control. The property manager or strata council paying for the work should confirm it’s in the spec before the contract is awarded.
If you’re reviewing a restoration scope and there’s no mention of adhesion testing, that’s worth raising — not as a complication, but as the cheapest insurance on the entire project. A sealant program that hasn’t been pull tested is a facade-wide bet that everything bonded correctly, placed sight unseen. The test turns that bet into a documented fact.
A few repaired test spots, or a re-do of the whole envelope after the leaks start. That’s the actual trade-off, and it’s not close.
Related guides
- Sealant and Caulking Hub — sealant types and BC-specific considerations
- Silicone vs Polyurethane for Expansion Joints in BC — matching material to substrate and movement
- Caulking Removal vs Cap Bead: When to Restore Sealants — the repair decision testing informs
- Signs Your Building Needs Sealant Replacement — recognizing failure at the facade level
Frequently Asked Questions
More from Sealant & Caulking Guide
Expansion Joint Failure Between Precast Concrete Panels in Vancouver
The joints between precast panels on a Vancouver high-rise move constantly, and sealant is the only thing keeping rain out. Why they fail and how to fix them.
Read article →Window Perimeter Sealant Failure on Vancouver Curtain Wall Towers
The sealant around window and curtain wall joints is the first line of defence against wind-driven rain on a Vancouver tower — and the first thing to fail. How to spot it, why it happens, and what restoration actually involves.
Read article →Sealant Removal vs Cap-Bead Repair: When to Use Each on BC Buildings
Cap-bead sealant repair is faster and cheaper than full removal and replacement — but it's also the most common reason re-caulking work fails within two years. When each approach makes sense, what the actual labour difference is, and how to specify the right approach in your tender.
Read article →