Window Perimeter Sealant Failure on Vancouver Curtain Wall Towers
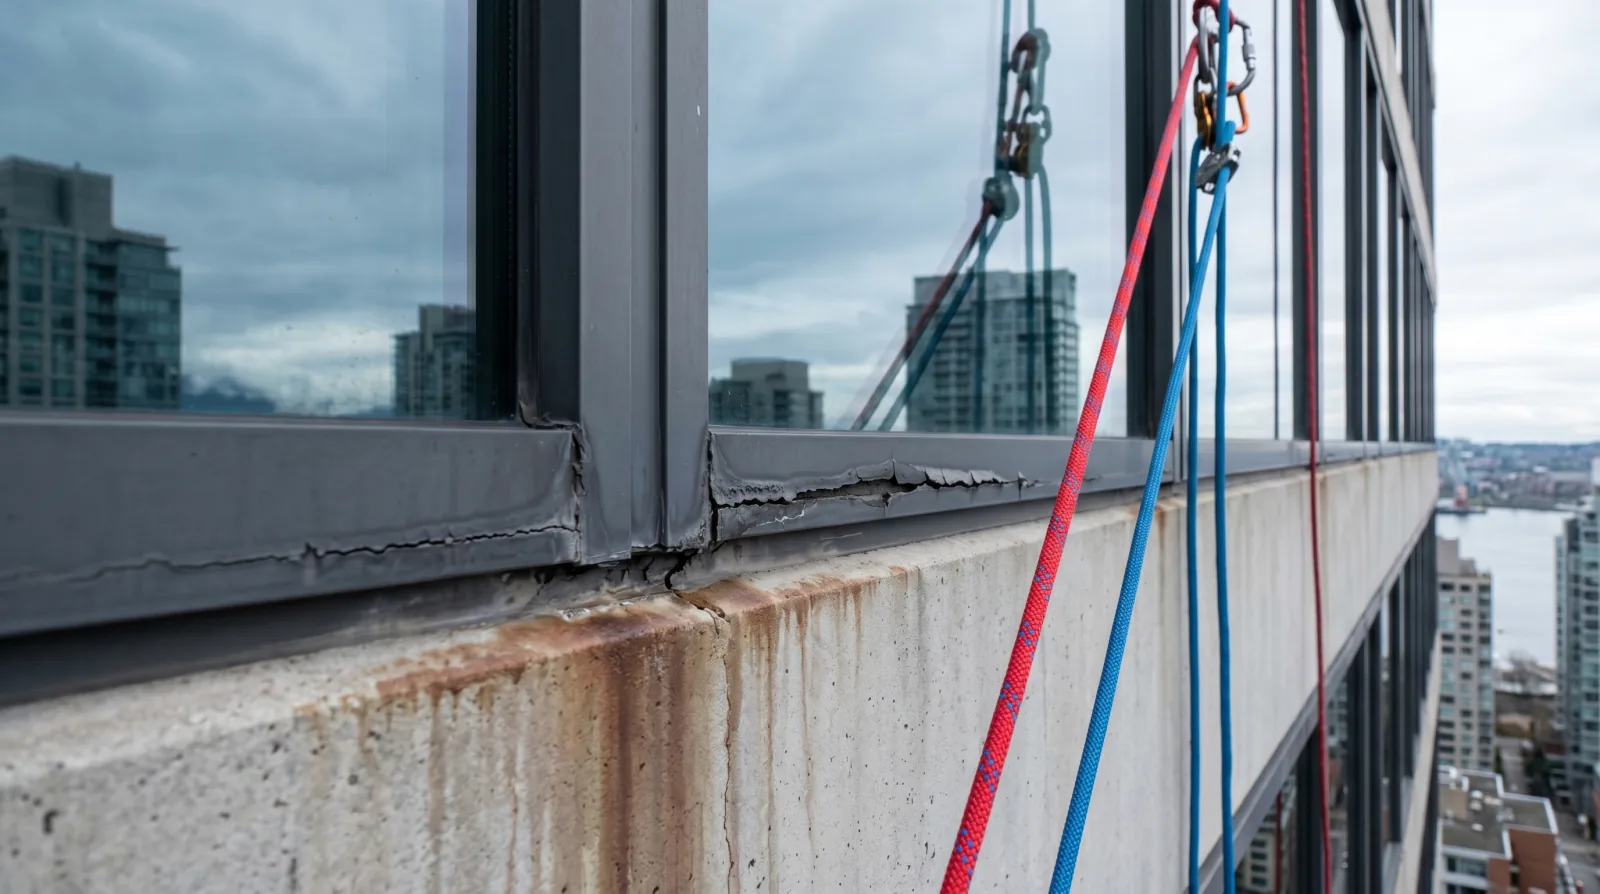
The leak almost never shows up where the water gets in. A resident on the 18th floor of a downtown Vancouver tower notices a stain spreading across the drywall below their living room window. By the time they call the property manager, the water has been tracking down the inside of the wall for weeks — and the actual failure is a cracked sealant bead two metres up and over from the stain.
Window and curtain wall perimeter joints are where the building envelope is most vulnerable, and on a glass tower they are the first thing to fail. Not because the work was done badly, but because those joints take more abuse than anything else on the facade.
Why the window joint is the weak point
A curtain wall is a system of aluminum framing and glass hung off the structure. Aluminum and glass both expand and contract with temperature far more than concrete does — a long aluminum mullion can move several millimetres across a single hot-to-cold cycle. Every joint where glass meets aluminum, and where the window assembly meets the surrounding structure, has to absorb that movement.
The sealant in those joints is the part doing the flexing. It stretches and compresses every day. On the south and west elevations of a Vancouver tower, it does that while taking the full force of wind-driven rain through six or more months of Pacific Northwest storm season, plus the most direct UV exposure on the building.
That is a harder service life than any other sealant on the structure. The expansion joints between concrete panels move, but they don’t take the same thermal cycling. The sealant around a parkade joint is sheltered. The window perimeter gets all of it at once — which is why it wears out first.
What failure looks like
From the ground, you usually can’t see it. Window sealant failure is a close-up condition, and on a tower the only reliable way to assess it is from rope access or a swing stage. What a technician finds at the joint tells the story:
- Cracking and crazing — the sealant surface develops a network of fine cracks as the material hardens and loses flexibility
- Adhesion loss — the bead pulls away from the glass, the aluminum frame, or the surrounding substrate, leaving a gap that channels water straight in
- Chalking and fading — UV breakdown leaves a powdery, discoloured surface; the material has lost its elasticity
- Cohesive splitting — the bead tears down its middle as it can no longer stretch to accommodate the joint movement
Inside the suite, the signs are indirect: staining on drywall below or beside windows, fogged sealed glass units (a separate failure, but often found alongside perimeter problems), peeling paint at the perimeter, or a musty smell that points to moisture in the wall.
The leaky condo connection
Many Metro Vancouver buildings from the 1980s and 90s were built with face-sealed window details — meaning the exterior sealant was effectively the only barrier stopping water at the opening. There was no rainscreen cavity behind it, no secondary drainage path, and often inadequate flashing. When the sealant failed, water reached the structure directly. That detailing is a core part of the rainscreen and leaky condo legacy that reshaped how BC builds.
Modern towers are detailed better, with drained and back-ventilated systems that don’t rely on a single bead of caulking. But even on a well-built building, the window perimeter sealant is still a primary weather barrier that wears out and needs replacing. The difference is that on a good building, a sealant failure is a maintenance problem caught early — not a structural emergency.
Why re-caulking from inside doesn’t work
A common and expensive mistake: a property manager gets a complaint about a leak, and a contractor re-does the interior caulking around the window. The leak continues. Why? Because the seal that failed is on the exterior face of the joint, exposed to the rain. The interior caulking is an air seal, part of the building’s airtightness, and it has nothing to do with stopping water that has already entered the wall cavity.
The weather seal must be replaced from outside. On a tower, that means rope access or a swing stage, because the joints are at height and on the weather face of the building.
What restoration actually involves
Restoring window perimeter sealant is the same disciplined process as any quality sealant work, applied to a harder-to-reach location:
- Assess each joint — at close range, categorize which joints need full removal and which are still sound. A blanket re-seal of every window wastes money on joints that don’t need it.
- Cut out the failed sealant — remove all of the old material from both substrate faces. Cap-bead repair over failed window sealant rarely holds, because the joint movement that broke the original will break a thin cap-bead faster. The sealant removal vs cap-bead comparison covers when each is appropriate.
- Clean and prime — prepare the glass, aluminum, and substrate per the sealant manufacturer’s specification. Adhesion to glass and anodized aluminum depends entirely on surface prep and the right primer.
- Install backer rod — set the correct joint depth and create the proper hourglass profile so the sealant can flex without tearing.
- Apply and tool the new sealant — a continuous bead, fully wetting both faces, tooled smooth for appearance and water-shedding.
Material choice matters. Curtain wall glazing joints usually call for a weatherseal silicone that bonds well to glass and tolerates UV. Perimeter joints where the window meets concrete may use polyurethane. The critical rule: silicone and polyurethane don’t bond to each other, so you can’t cap-bead one over the other. Where the original is silicone, the restoration is silicone — material continuity is not optional.
Rope access changes the economics
On a tall Vancouver tower, the access method drives the cost more than the sealant itself. Erecting a swing stage or scaffolding means a street-use permit, staging on the sidewalk, and weeks of setup before any work happens. IRATA or SPRAT certified rope access technicians, working under WorkSafeBC Part 11 fall protection standards, reach every joint on an elevation without a street-level platform.
For a sealant program — which is inherently a “touch every joint” job spread across the whole facade — rope access is often the most efficient method. The crew works down the elevation joint by joint, and there’s no permit-dependent staging tying up the sidewalk for the duration.
Don’t wait for the stain
The pattern with window sealant is predictable: it degrades quietly for years, then a winter storm finds the weak joint and a resident sees a stain. At that point the repair scope has grown — sealant, drywall, insulation, sometimes framing, plus a moisture investigation to confirm the source.
Treating window perimeter sealant as a planned wear item — assessed on a regular inspection cycle and restored before it fails — is far cheaper than chasing leaks after they appear. For strata councils, building it into the building envelope maintenance plan alongside the rest of the facade is the difference between a maintenance line item and an emergency repair.
Related guides
- Sealant and Caulking Hub — sealant types, lifespan, and BC-specific considerations
- Signs Your Building Needs Sealant Replacement — when to initiate restoration
- What Causes Water Ingress in High-Rise Buildings — the full picture of envelope leaks
- Rope Access vs Swing Stage — choosing the right access method for facade work
Frequently Asked Questions
More from Sealant & Caulking Guide
Field Sealant Adhesion Testing on BC Restoration Projects
A sealant that won't stick is a leak waiting to happen. Why a hand pull test on a Surrey restoration project catches the failure before it ever ships.
Read article →Expansion Joint Failure Between Precast Concrete Panels in Vancouver
The joints between precast panels on a Vancouver high-rise move constantly, and sealant is the only thing keeping rain out. Why they fail and how to fix them.
Read article →Sealant Removal vs Cap-Bead Repair: When to Use Each on BC Buildings
Cap-bead sealant repair is faster and cheaper than full removal and replacement — but it's also the most common reason re-caulking work fails within two years. When each approach makes sense, what the actual labour difference is, and how to specify the right approach in your tender.
Read article →