Canopy leaks: wall joint vs. glazing gasket vs. drainage
Water dripping through a glass canopy onto your entrance has three usual causes, and cleaning fixes none of them. A split sealant joint where the canopy meets the building is the most common. A hardened or displaced gasket at a glazing bar between panels is second. A drainage channel packed solid with needles and moss, so water backs up and overtops the edge, is third and is the cheapest to put right.
From the ground they look identical: water where it should not be. They are not identical, and the expensive mistake is sealing whichever gap is visible without establishing which one is actually letting water through. Fresh silicone over the wrong joint hides the problem for a season and leaves the real path open, and on a canopy the real path often runs into the wall rather than onto the entrance. This page sets out how to tell the three apart from where you are standing, and what a repair that actually holds looks like.
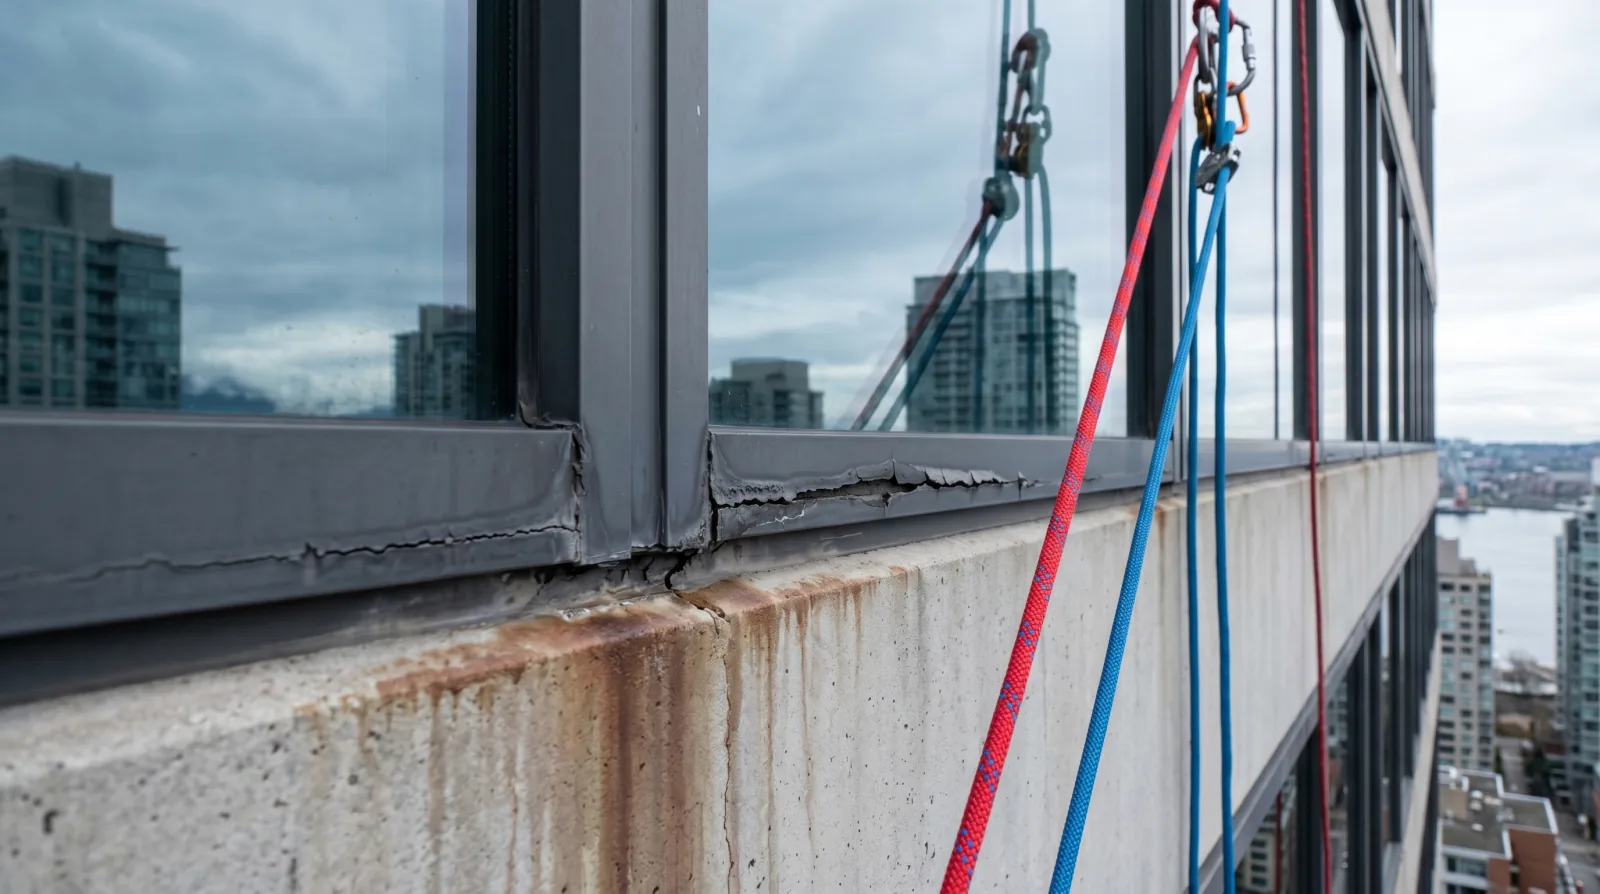
Read the drip pattern before you touch anything
Most of the diagnosis can be done from the sidewalk during a decent rainfall, which is worth doing before anybody quotes.
Water appearing at the back edge, against the building, or running down the wall face behind the canopy, points at the wall joint. That junction is the highest-movement detail on the assembly, because the canopy and the wall expand and contract independently of each other, and it is almost always the oldest sealant on the structure because nobody has ever inspected it.
Drips falling in a straight line partway across the canopy point at a seam. Look directly above the drip line and there will be a glazing bar or a panel-to-panel joint running along it. A linear pattern is not something a wall joint produces.
Water sheeting over the leading edge in heavy rain, or standing on the glass hours after the rain has stopped, points at drainage. A canopy is sloped to shed. If water is still sitting there afterwards, the outlet is not carrying flow, and that same standing water is also what drives the mineral staining covered in mineral staining versus surface dirt.
Two further clues are worth having. A leak that only happens in wind-driven rain from one direction is usually a bead that has debonded on one face. It holds against water running down and fails against water pushed at it. And water that comes through rust-coloured rather than clear is running over a corroding fitting on the way, which turns this from a sealant question into an inspection of the connections holding glass above a doorway.
Why the wall joint fails first
The junction between a canopy and a building does more work than any other part of the assembly and receives the least attention. Every warm afternoon and cold night the two elements move relative to each other, and the sealant bead has to stretch and compress to keep the joint closed. Over years, that is an enormous number of cycles on a material sitting in direct UV.
A bead that was installed properly handles it. That means the substrates were cleaned back to sound surface, the primer the manufacturer specifies was actually applied, backer rod or a bond breaker was set so the bead bonds on two faces and not three, and the geometry followed the joint design guidance in ASTM C1193. A high-movement weatherseal silicone rated to ASTM C920 Class 50 will take plus or minus half the joint width in movement and keep bonding.
A bead that was gunned over a dusty, damp, or unprimed surface fails at the bond line, and it peels away cleanly rather than crumbling. That clean peel is the tell that the failure was adhesion rather than the product. It is also why a cap bead over an existing failed joint is not a repair: the new material bonds to the old sealant, and it lets go at exactly the same line, just later and less visibly.
One more cause worth naming, because it is preventable. A high-pressure jet aimed upward at the wall junction during a cleaning visit will drive water under the edge of an aging bead and tear the bond at the top face. A canopy that was dry for years and starts leaking six weeks after a cheap wash did not fail on its own schedule. Our guide to soft wash versus pressure washing covers why the cleaning method belongs in the contract.
Gaskets, glazing bars, and the discontinued part problem
Where a canopy is made of more than one panel, there is a seal along every line between panels. On many assemblies that is a pre-formed rubber gasket compressed between the glass and the glazing bar; on others it is a wet-applied bead.
Gaskets fail by drying out. Decades of UV harden the rubber and shrink it, and once it has hardened it no longer springs back against the glass, so the compression that made it seal is gone. It typically pulls back at panel corners first, which is where you see the gaps. Sometimes it works its way out of the channel entirely.
Then comes the practical trap. The exact gasket profile for a canopy installed decades ago is frequently no longer manufactured, and the seal depends on the cross-section matching the channel. A building owner who wants to do the correct thing and replace like with like finds the part does not exist. Chasing it stalls the repair indefinitely, and the working answer is a wet reseal at the bar, prepared and primed to the same standard as any glazing seal. The same logic plays out at full building scale on older glazed towers, which we cover in wet glazing versus dry glazing.
Drainage: the cheapest fix and the one nobody checks
Many canopies have a channel, gutter, or scupper at the leading edge that collects the water coming down the slope and takes it somewhere sensible. Nobody looks in it. Over two autumns under cedars or maples it packs solid with needles, leaf matter, and moss, and then it stops carrying flow.
What follows is entirely predictable. Water backs up behind the edge detail, which was designed to shed running water rather than hold back standing water, and it finds a way over or through. On a North Shore entrance under mature trees this produces a canopy that leaks every November and is perfectly fine by May, which confuses owners into thinking a seal is failing seasonally.
Clearing the channel by hand and then flow-testing it with water, actually confirming water leaves rather than assuming it will because the channel looks clear, resolves that leak completely. It also addresses the mineral staining on the glass, since standing water evaporating in the band nearest the wall is what deposits the minerals. This is why any competent canopy assessment starts here: it is the cheapest of the three causes to rule in or out, and doing it first stops an owner buying sealant work they did not need.
When the leak is going into the wall
Not every canopy leak shows up under the canopy. Where water gets past the junction it can track behind the canopy into the wall assembly, cross laterally, and appear as a damp patch on an interior wall metres from where it entered. At that point the visible stain is not a map to the entry point, and sealing under it can leave the real path open beneath fresh silicone.
This is the situation where the job stops being a canopy repair and becomes a water ingress investigation: inspect the junction closely with proper access, look at how the canopy is anchored through the cladding, and water-test methodically from low to high until the leak is reproduced. It may turn out to be the canopy joint. It may equally be a flashing detail above the canopy that has nothing to do with it, and the only way to know is to reproduce the leak rather than reason about it. That work sits with our leak and water ingress service.
Metro Vancouver has an expensive institutional memory of what happens when water gets into wall assemblies and travels before it shows. A canopy junction quietly leaking into a wall for a couple of years is a small version of the same problem, and it is worth taking seriously the first time somebody notices a stain rather than the third.
What a repair that holds looks like
Cut out the failed material along the affected run rather than capping it. Clean both substrates back to sound surface, removing dust, salt film, and old residue. Apply the primer the sealant manufacturer specifies for aluminum and for the wall material, because on those substrates the primer is often what makes the bond hold. Set backer rod or a bond breaker so the bead bonds on two faces and can stretch, with the depth-to-width geometry from ASTM C1193. Then gun and tool a neutral-cure high-movement silicone. Neutral-cure rather than acetoxy, because acid-cure chemistry releases acidic byproducts that are the wrong thing to put against an aluminum frame.
Then verify it, twice. A field hand-pull adhesion check per ASTM C1521 on the cured bead confirms it is genuinely bonded on this building rather than merely looking neat. A controlled water test reproducing the original condition confirms the path is closed. Without both, nobody knows whether the repair held until the next storm demonstrates it in front of customers. This is ordinary building envelope work and it sits with our sealant and caulking service.
Last, put the joint on a schedule. A canopy gets cleaned anyway, and somebody with access set up is already close enough to see a hairline split before it becomes a drip. That inspection costs almost nothing added to a cleaning visit, and it is the difference between a planned repair booked for a Tuesday morning and an emergency call during service.
Four Metro Vancouver scenarios
Restaurant awnings dripping on guests at the door, downtown Vancouver
A downtown restaurant has two glass awnings over the entrance and water comes through onto guests during heavy rain. Staff have been putting a mat down. The temptation is to have someone run a bead of caulk along whatever looks like a gap, and that is how this becomes a recurring problem. The sequence that works: get access, look at the wall joint along its full length, check the glazing bar between the two panels, and clear and flow-test the drainage channel at the leading edge. On a canopy that has never been maintained, the channel is often packed solid and the water is simply backing up. If it still leaks after the drainage is flowing, the wall joint gets cut out, prepared properly, primed, and resealed with a high-movement neutral-cure silicone, and then water-tested before anyone calls it done.
Call: Drainage first, then trace, then reseal and test.
Strata lobby canopy, stain appearing on the interior wall above the doors
A Vancouver strata reports a damp patch on the interior wall above the lobby doors, under a glass canopy. Nothing is dripping outside. This is the case where the instinct to seal the visible symptom does the most damage, because the stain inside is not above the entry point, because water crosses laterally inside a wall assembly before it appears. The correct approach is to treat it as a water ingress investigation rather than a canopy repair: inspect the canopy-to-wall junction closely, look at how the canopy is anchored through the cladding, and water-test methodically from low to high until the entry point is reproduced. It may turn out to be the canopy joint. It may equally be a flashing detail above the canopy that has nothing to do with it. Resealing before knowing is how a strata pays twice.
Call: Investigate as water ingress, not as a canopy repair.
North Vancouver canopy under cedars, overtopping every autumn
A North Vancouver building has a canopy over the entrance that runs like a waterfall over the leading edge every November and is fine by May. Nothing has failed. The channel at the leading edge fills with cedar needles through the autumn drop, stops carrying flow, and water backs up until it overtops the edge detail. Clearing it and flow-testing it fixes the leak completely, and doing that on an annual autumn visit stops it recurring. The wider point for this building is that the same standing water is what has been staining the glass in the band nearest the wall, so the drainage fix addresses two complaints at once. Anyone quoting sealant work on this canopy without looking in the channel first has not diagnosed anything.
Call: Clear and flow-test the channel on an autumn schedule.
Canopy that started leaking six weeks after a cheap pressure wash, Burnaby
A Burnaby retail unit had its entrance canopy pressure washed in September. In late October, water started running down the wall behind the canopy for the first time in years. The canopy did not fail on its own. A high-pressure jet aimed upward at the junction with the building drove water under the edge of a sealant bead that had been quietly aging, and tore the bond at the top face. This is a repair now, not a warranty argument, and the scope is the same as any wall joint failure: cut out the compromised material along the affected run, clean and prime both substrates, set the joint properly, tool a high-movement neutral-cure silicone, and water-test it. The lesson for the property is to specify the cleaning method in the contract rather than taking the lowest number.
Call: Reseal properly, and change the cleaning specification.
Decision framework: nine observations and what they point at
| What you see | Likely cause | Reason |
|---|---|---|
| Water appears at the back edge, against the wall? | Wall joint sealant | The junction with the building is the most likely failure and the highest-movement joint on the assembly. Drips at the wall line point straight at it. |
| Drips fall in a straight line partway across the canopy? | Glazing bar or gasket | A linear drip pattern follows a seam. Look directly above the line: there will be a glazing bar or a panel-to-panel joint running along it. |
| Water sheets over the leading edge in heavy rain? | Drainage blockage | The channel is not carrying flow, so water backs up and overtops. Clear it and flow-test before assuming any seal has failed. |
| Standing water on the panel hours after the rain stops? | Drainage first | A canopy is sloped to shed. Water that is still there afterwards means the outlet is blocked, and that standing water is also what drives the mineral staining on the glass. |
| Stain appearing inside the building above the door? | Trace before sealing | Water travels laterally inside a wall before it shows. The stain is not a map to the entry point, and sealing under the stain can leave the real leak open beneath fresh silicone. |
| Leak started shortly after a pressure wash? | Wall joint, almost certainly | A jet driven under the edge of an aging bead tears the bond at the top of the canopy. A canopy that was dry before a cleaning visit and drips afterwards is telling you exactly what happened. |
| Rust-coloured water rather than clear? | Inspect the fittings | Water carrying corrosion product is running over a degrading fitting or fastener on its way through. That is a structural inspection item on an element above a doorway, not a sealant question. |
| Original gasket profile no longer manufactured? | Wet reseal at the bar | Chasing a discontinued part stalls the repair indefinitely. A properly prepared and primed wet seal at the bar restores the seal without depending on a component that no longer exists. |
| Only leaks in wind-driven rain from one direction? | Wall joint on that elevation | Directional leaks point at a joint that holds against water running down but not against water being pushed at it. That is the signature of a bead that has debonded on one face. |
The three causes compared
Wall joint sealant failure
The sealed junction where the canopy meets the building has split, debonded, or been cut through. The most common cause of a leaking entrance canopy, and the one most often missed because nobody has ever been close enough to look at it.
Glazing gasket or bar seal failure
The seal between adjacent glass panels, or between a panel and its glazing bar, has hardened, shrunk, slipped, or been displaced. Water gets through the line between panels rather than at the wall.
Blocked drainage
The channel, gutter, or scupper at the leading edge has packed with needles, leaf matter, and moss, so water backs up behind the edge detail instead of leaving the canopy, and finds a way through or over.
Questions to ask before you approve the scope
A leaking canopy is where owners most often pay for a repair that does nothing. These eight questions put the diagnosis before the sealant.
- How will you find where the water is actually getting in? Good answer: A close inspection of the wall joint, the glazing bars, and the drainage with proper access, followed by controlled water testing if the entry point is not obvious. Red flag: A quote to reseal the canopy with no investigation. Sealing the wrong joint leaves the real leak open and hides it under fresh silicone until the next storm.
- Have you checked the drainage before quoting sealant work? Good answer: Yes, cleared and flow-tested. If water was backing up, that is addressed first and we see whether the leak persists. Red flag: Straight to sealant. A blocked channel loads details that were never designed to hold standing water, and resealing around it treats the symptom.
- What sealant will you use at the wall joint, and what is its movement class? Good answer: A neutral-cure silicone in a high-movement weatherseal grade rated to ASTM C920 Class 50, sized to the joint for the movement it will actually see. Red flag: No product or class named, or a general-purpose caulk. This is the highest-movement joint on the assembly and an undersized product will tear loose within a year.
- Acetoxy or neutral-cure against the aluminum? Good answer: Neutral-cure, always, on aluminum and glass, with the primer the manufacturer specifies for those substrates. Red flag: Acetoxy or acid-cure silicone. The acidic byproducts released during cure are the wrong chemistry to introduce against metal on a canopy frame.
- How will the joint be prepared? Good answer: Old material cut out, both substrates cleaned back to sound surface, primed per the manufacturer data, backer rod or bond breaker set so the bead bonds on two faces, then tooled to the geometry in ASTM C1193. Red flag: A fresh bead over the existing failed one. A cap bead over a debonded joint fails at the same bond line, just later and less visibly.
- How will you confirm the repair worked? Good answer: A field hand-pull adhesion check per ASTM C1521 on the cured bead, and a controlled water test reproducing the original leak condition. Red flag: No verification. Without a test you find out whether the repair held when the next storm tells you, which on an entrance means telling a customer.
- Will you inspect the fittings while you are up there? Good answer: Yes, with a written note on bolts, brackets, and spider fittings, especially on oceanfront exposure where salt attacks the fixings. Red flag: Sealant only. The access is already set up and a corroding connection on an element above a doorway is worth knowing about now.
- Is this leak going into the wall as well as onto the entrance? Good answer: An assessment of whether water is tracking behind the canopy into the wall assembly, and a recommendation if it is. Red flag: Treating a canopy leak purely as a nuisance drip. Water entering a wall at a canopy junction does damage nobody sees until it is expensive.
If the canopy is old enough that the leak is one symptom among several, the replacement question is covered in restore vs. replace a glass canopy, and the full glass canopy and awning hub links the rest.
Quick answers
Why is water dripping through my glass canopy?
Three causes account for nearly all of it. The most common is a split or debonded sealant joint where the canopy meets the building wall, which moves every day with thermal cycling and eventually tears. Second is a failed or displaced gasket or bar seal between adjacent glass panels. Third is a drainage channel or scupper at the leading edge packed with needles and moss, so water backs up and overtops the edge detail. They look similar from the ground and need completely different repairs, so the leak path gets traced before anything is sealed.
How can I tell which of the three it is without getting up there?
Watch where the water appears during rain. Drips at the back edge against the wall point at the wall joint. Drips falling in a straight line partway across the canopy follow a glazing bar or a panel-to-panel seam. Water sheeting over the leading edge, or standing on the panel hours after the rain has stopped, points at blocked drainage. One more clue: a leak that only happens in wind-driven rain from one direction is usually a bead that has debonded on one face, since it holds against water running down but not against water pushed at it.
Will cleaning the canopy fix the leak?
No, and cleaning a leaking canopy before it has been investigated makes the diagnosis harder. The one exception is a drainage blockage, which is technically a maintenance problem rather than a failure, and clearing the channel does genuinely stop that leak. But if the water is coming through a failed seal, adding more water to an assembly with an open path just moves it around, and a pressure wash in that situation can turn a small split into an active leak.
Canopy leak questions
Why is water dripping through my glass canopy?
Three causes account for nearly all of it. The most common is a split or debonded sealant joint where the canopy meets the building wall, which moves every day with thermal cycling and eventually tears. Second is a failed or displaced gasket or bar seal between adjacent glass panels. Third is a drainage channel or scupper at the leading edge packed with needles and moss, so water backs up and overtops the edge detail. They look similar from the ground and need completely different repairs, so the leak path gets traced before anything is sealed.
How can I tell which of the three it is without getting up there?
Watch where the water appears during rain. Drips at the back edge against the wall point at the wall joint. Drips falling in a straight line partway across the canopy follow a glazing bar or a panel-to-panel seam. Water sheeting over the leading edge, or standing on the panel hours after the rain has stopped, points at blocked drainage. One more clue: a leak that only happens in wind-driven rain from one direction is usually a bead that has debonded on one face, since it holds against water running down but not against water pushed at it.
Will cleaning the canopy fix the leak?
No, and cleaning a leaking canopy before it has been investigated makes the diagnosis harder. The one exception is a drainage blockage, which is technically a maintenance problem rather than a failure, and clearing the channel does genuinely stop that leak. But if the water is coming through a failed seal, adding more water to an assembly with an open path just moves it around, and a pressure wash in that situation can turn a small split into an active leak.
Can I just run a bead of caulk along the gap myself?
It will fail, usually within a season, and it makes the eventual proper repair more expensive. A sealant bead works by bonding to two clean, prepared, primed faces with a backer rod or bond breaker behind it so it can stretch as the joint moves. A cap bead applied over failed material bonds to the old sealant rather than to the substrate, and it lets go at the same line. It also hides the failure, so nobody sees the joint deteriorating underneath until water is already inside the wall.
What sealant should be used at the canopy-to-wall joint?
A neutral-cure silicone in a high-movement weatherseal grade, rated to ASTM C920 Class 50, sized to the joint for the movement it will see. Neutral-cure rather than acetoxy, because acid-cure silicone releases acidic byproducts during cure that are the wrong thing to introduce against an aluminum frame. The joint geometry follows ASTM C1193, meaning correct depth against width with backer rod or a bond breaker so the bead bonds on two faces and not three.
The stain is on the inside wall, not under the canopy. Is it still the canopy?
Maybe, and you cannot tell from the stain. Water travels laterally inside a wall assembly before it shows on a surface, so the visible damp patch is not a map to the entry point. This is a water ingress investigation rather than a canopy repair: inspect the junction, look at how the canopy is anchored through the cladding, and water-test methodically from low to high until the leak is reproduced. It may be the canopy joint, and it may equally be a flashing detail above it that has nothing to do with the canopy.
My canopy started leaking after it was cleaned. What happened?
A pressure wash aimed at the junction with the building drove water under the edge of a sealant bead that was already aging, and tore the bond at the top face. It is a common sequence and the timing gives it away: a canopy that was dry for years and drips six weeks after a cleaning visit was not failing on its own schedule. The repair is a proper wall joint reseal. The prevention is specifying soft washing rather than pressure in the cleaning contract.
How do you confirm a canopy leak repair actually worked?
Two checks. A field hand-pull adhesion test per ASTM C1521 on the cured bead confirms it is genuinely bonded to the substrate on this building rather than just looking neat. Then a controlled water test reproducing the original leak condition confirms the path is closed. Without both, nobody knows whether the repair held until the next storm demonstrates it, which on an entrance canopy means finding out in front of customers.
Canopy dripping on your entrance?
We trace the real water path before we seal anything, then water-test the repair. Entrance canopies and glazed junctions across Vancouver, North Vancouver, West Vancouver, and Burnaby.